
Procaster GS-35 conversion & upgrades
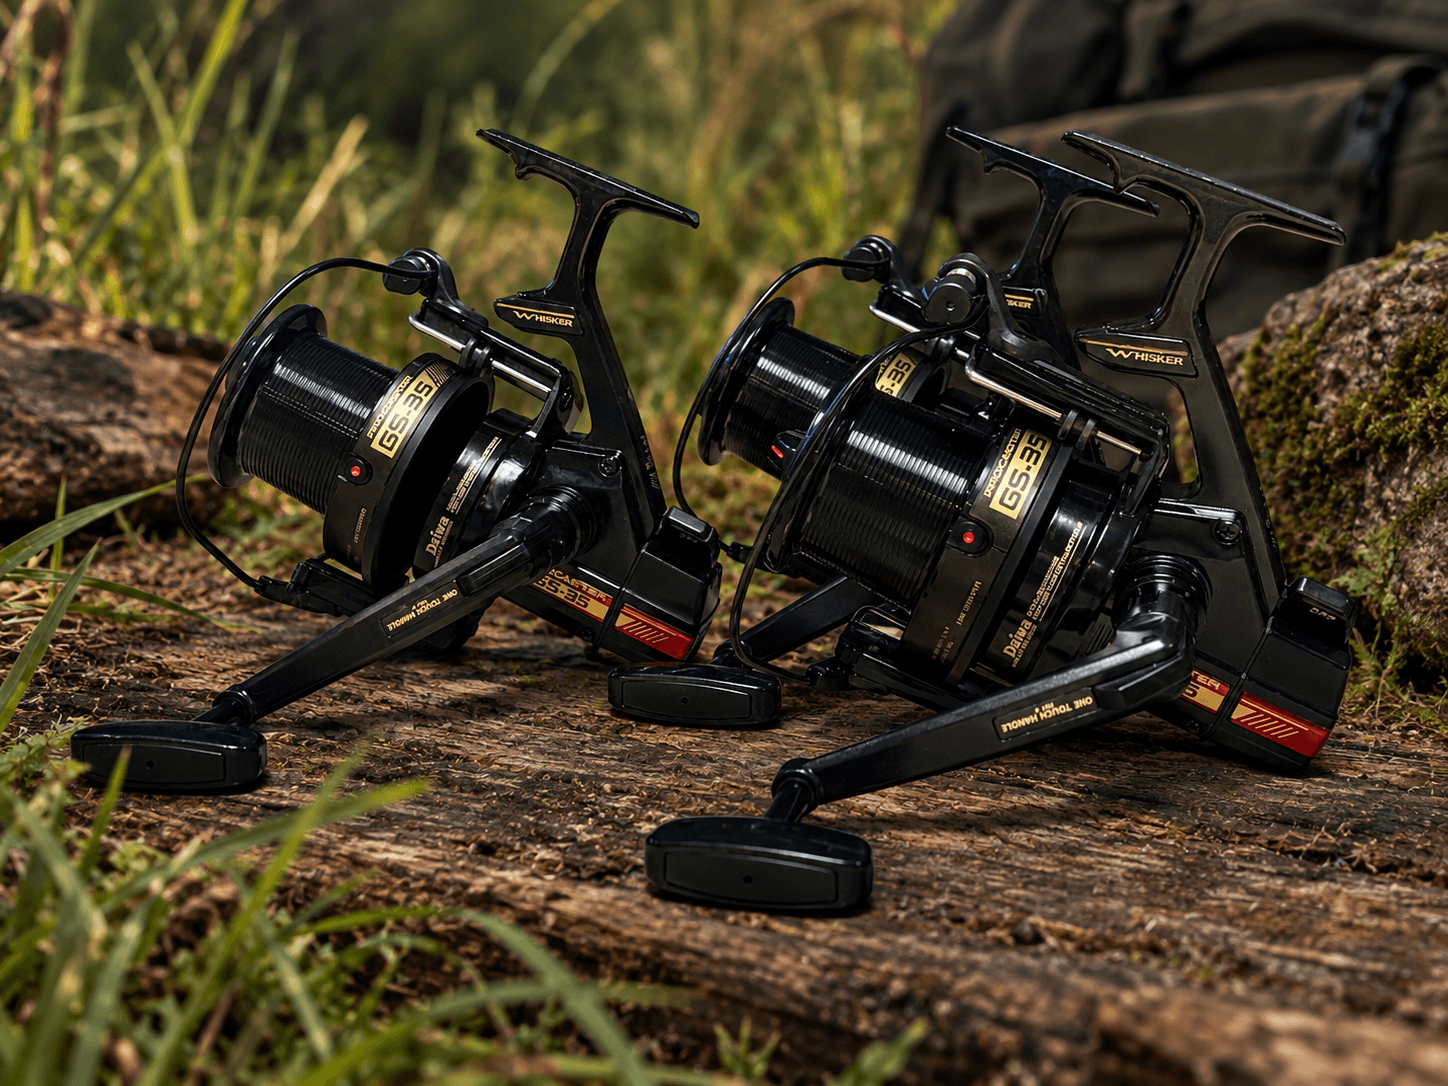
The Procaster GS-35 is a classic reel with striking looks. As an entry-level Procaster, it may not be the finest in its class, but in my opinion, it’s one of the best-looking. In this article, I’ll cover the drag conversion and a range of upgrades to bring the GS-35 up to a higher standard.
Buying a set
After quite a bit of patience, I managed to get hold of three reels in excellent condition straight from Japan. As I wanted to keep the original handles, finding reels in good condition was important. Worn drive gears would mean either finding square drive replacements, which can be pretty hard to come by, or fitting hex drive gears and having to change the handle as well. All three reels still needed a drag conversion. I also wanted to really improve them, which led to a whole range of upgrades and modifications.
The wishlist
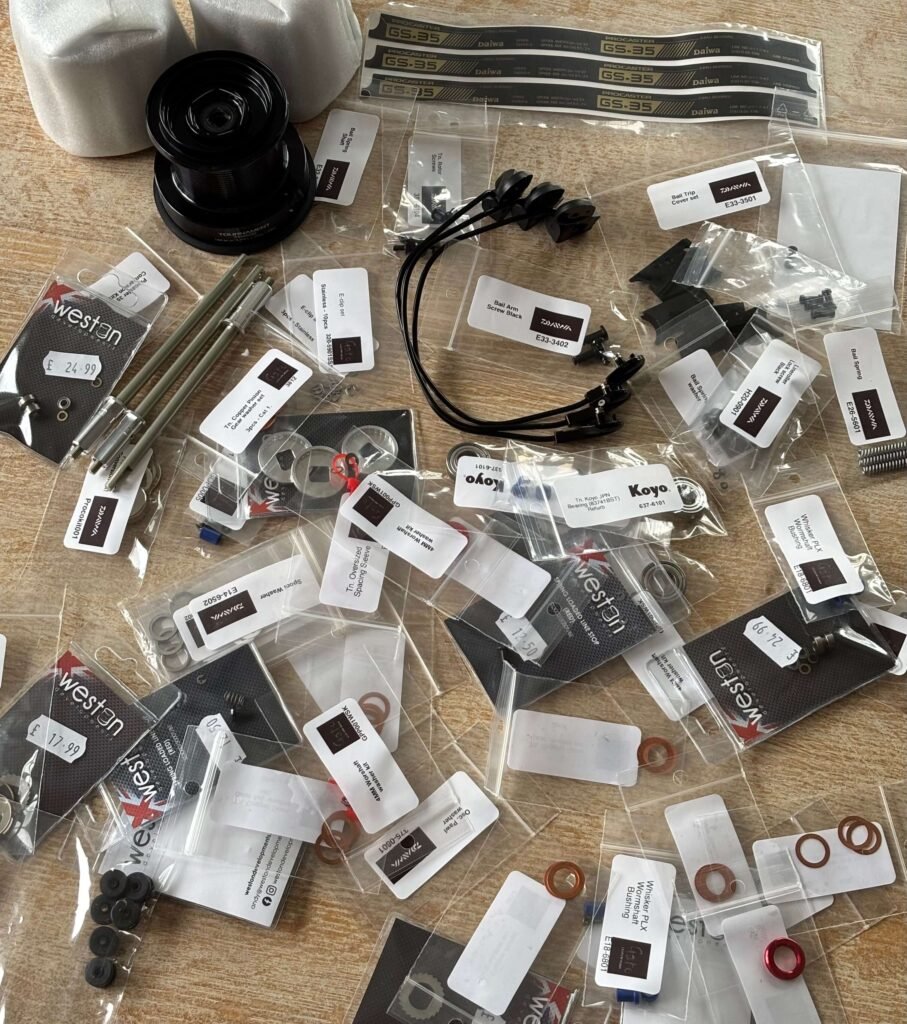
Once the reels were sorted, it was time to choose the upgrades. I settled on a good selection of upgrades to get the most out of them:
- Line roller upgrade
- Lineguard roller upgrade
- Rotor balancing
- Worm shaft bushing upgrade
- Anti-reverse upgrade
- Oversized spacing sleeve
- Copper pinion gear washer
- Extra ball bearing on the drive gear
- Drag conversion
- Oscillating pawl bush upgrade
- Oscillating pawl screw upgrade
- Drive gear shimming
- Line clip upgrade
- New spool wraps and top rings
- Quick drag upgrade
Please note that this involves a complete strip-down and rebuild of the reel. Some experience is recommended before carrying out this work yourself. As always, keep track of how everything comes apart and take plenty of photos if needed.
Rotor rebuild
I started with the rotor assembly. Since I wanted to balance the rotors, all other upgrades to the rotor had to be done first.
Line roller upgrade
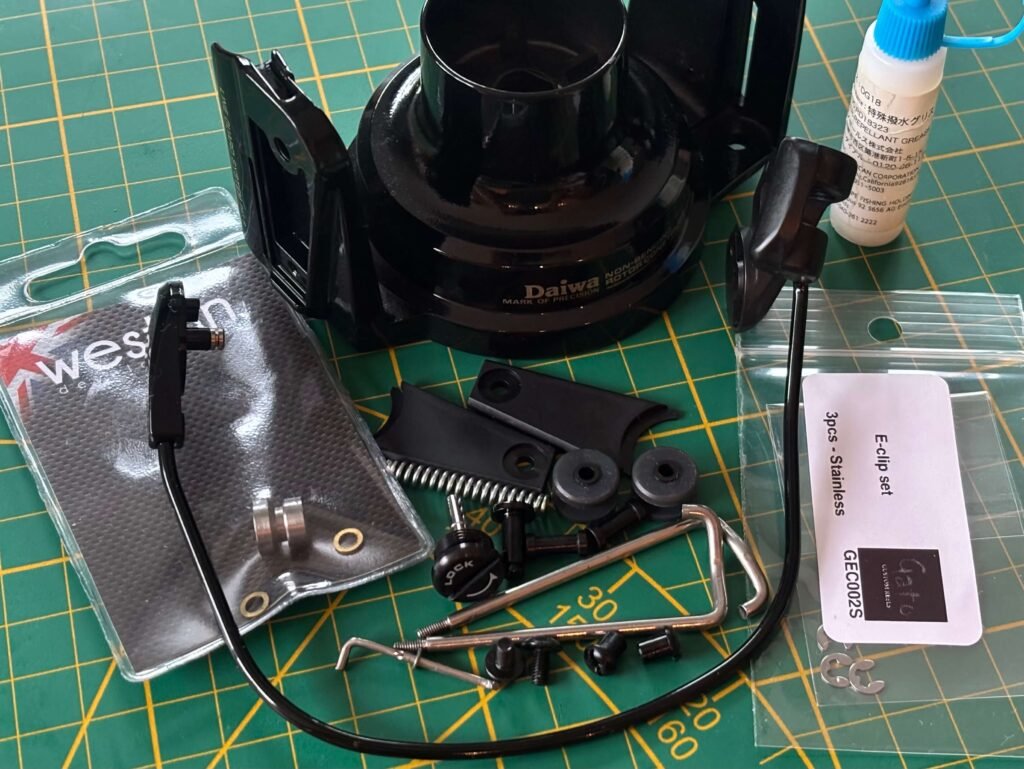
New and reused parts for the rotor assembly
The GS-35 has a simple line roller that runs on a bushing. Upgrading improves smoothness and extends line life. So I wanted to replace the line roller, to include at least one bearing. This means fitting a complete new bail assembly. I got new TS5000BE bail arms from Gato, along with black TS5000T bail pins and black TS5000BE line roller screws. I ordered titanium line rollers from Weston Developments, running on two EZO ball bearings.
I first stripped down the complete rotor assembly. The original bail assembly is secured with an E-clip on each side, these can be quite difficult to remove. Use plastic spudgers to avoid scratching the rotor, and be patient.. The original bail spring parts can be reused with the TS5000BE bail. Although it can be assembled dry, I usually apply a light smear of grease along the spring. I also apply a thin coat of grease to both ends of the bail and the bail pin before reassembly. While I was at it, I also replaced the bail trip covers and screws with new parts from Gato, ensuring everything looked as good as new.
Installing the new line roller is simple, although you may need to apply a little force to press the bearings onto the screw. I lubricated the bearings with Shimano DG18, a water-repellent grease. Unlike bearing oil, this grease is specifically designed for line roller bearings and provides longer lasting lubrication and protection. A small amount applied to both sides of the bearing is sufficient.
Lineguard roller upgrade
In order to reduce the ‘coffee grinder’ noise caused by the line guard system, TSM (Teflon Scheiben Markt) offers a line guard roller bushing upgrade, also available through Gato. These bushings fit inside the line rollers and, compared to the original bushings, their increased length should minimise binding, thereby reducing or even eliminating noise. It seemed well worth trying this upgrade. I cleaned the line guard roller shafts thoroughly before applying a coat of PTFE (Teflon) spray.
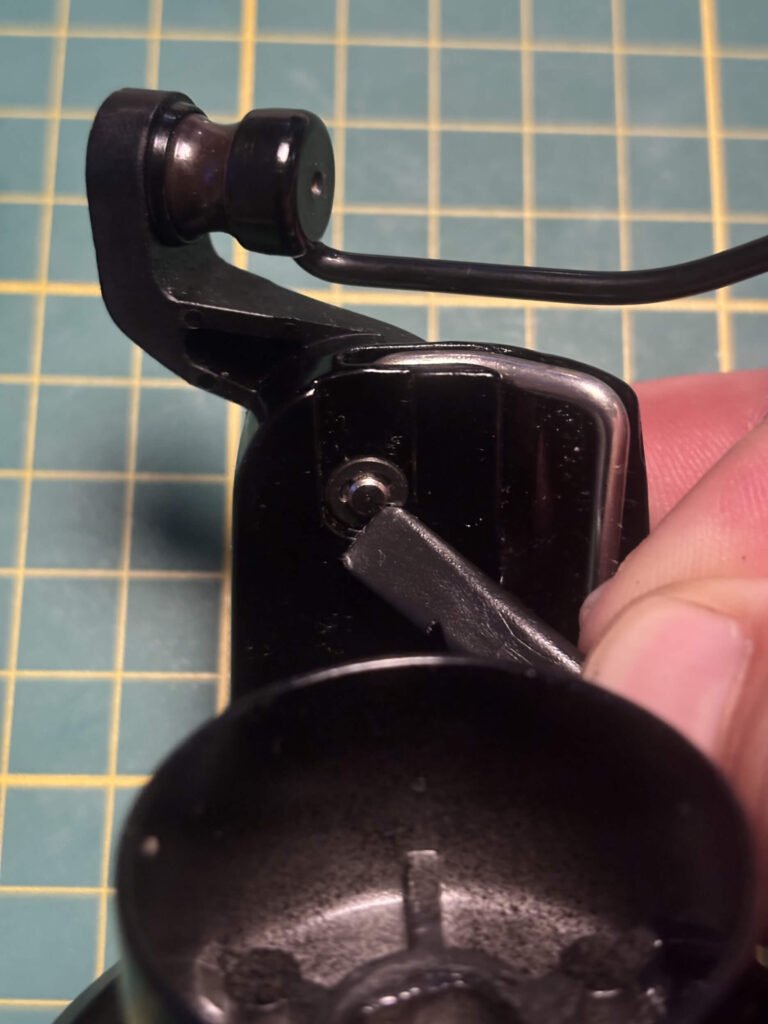
Removing the original bail using a spudger
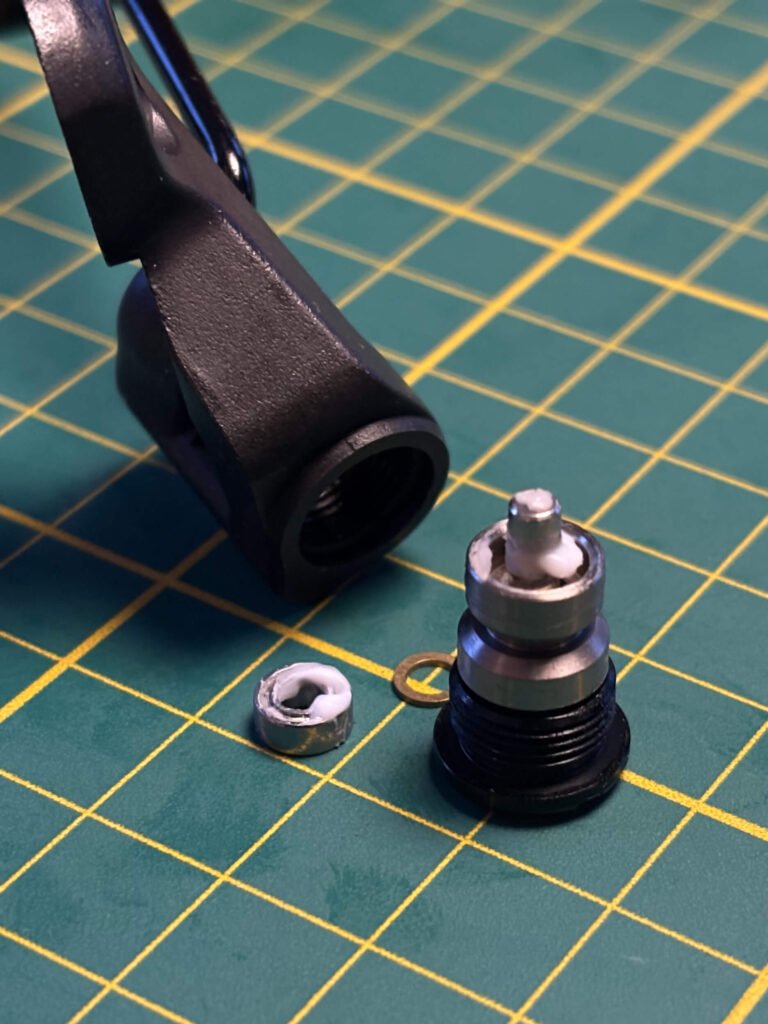
New bail parts, lubricated with Shimano DG18
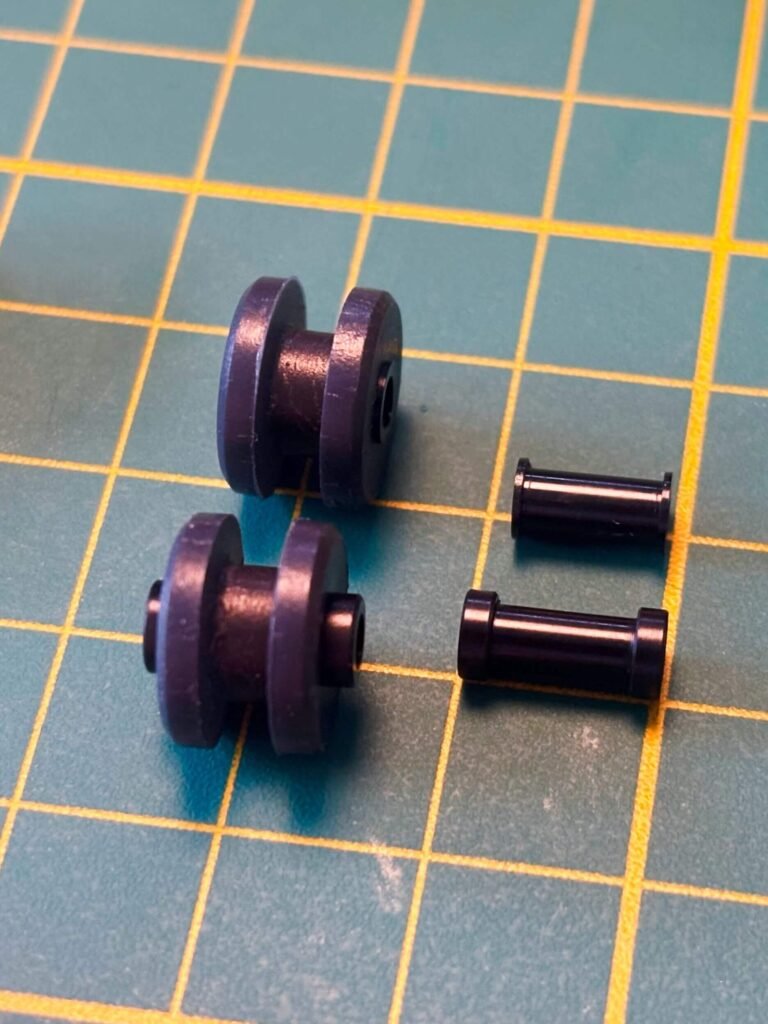
Original vs upgraded lineguard rollers
Rotor balancing
The rotor assembly is not balanced, and the upgraded parts have probably made the imbalance even worse. Rotor balancing was therefore high on my list, as it helps improve smoothness, reduce noise and wear, and slightly improve line lay. As I lacked the necessary equipment, I had Tim from Gato Custom Reels balance the rotors using a machine built to his specifications by Dutch Carp Metals. Small lead strips are secured inside the rotor with Bostik Blu Tack rather than adhesive, allowing them to be removed if needed. Blu Tack is also commonly used to secure isotopes in bite alarms.
Complete any bail modifications beforehand, as replacing parts afterwards can throw the rotor out of balance again. With the rotor complete, I could move on to the body.
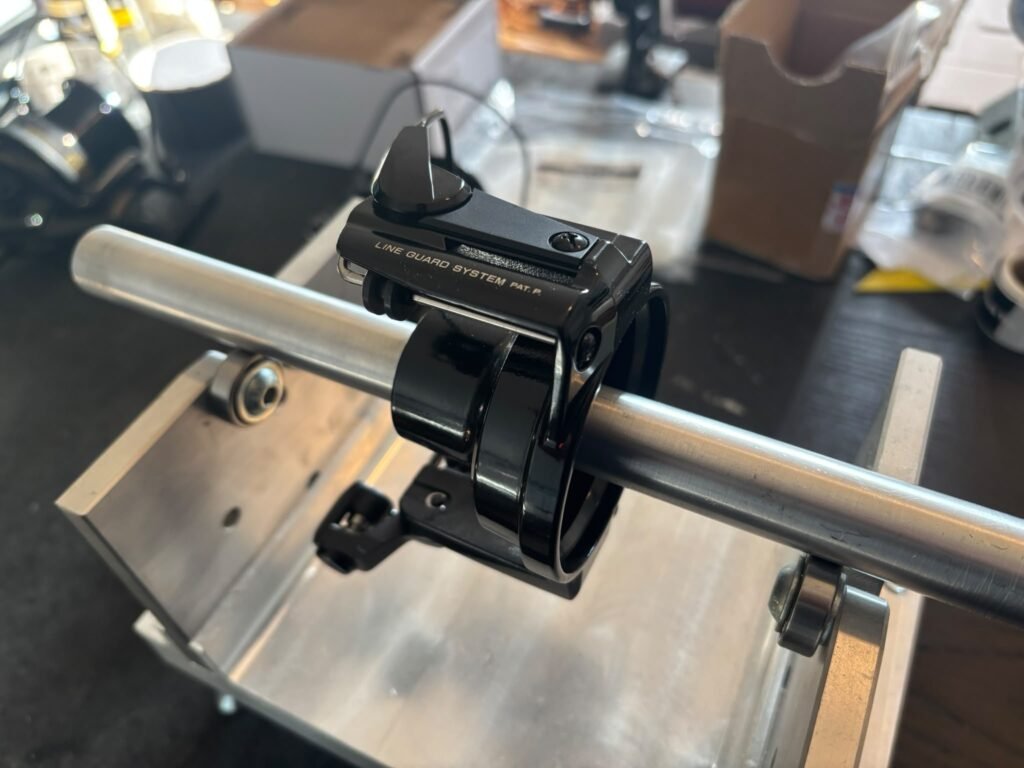
Balancing by adding weights inside the rotor

The rotor assembly now completed
Body rebuild
Next, the body was almost completely stripped. The anti-reverse lever and pawl were left in place, as they worked properly and the inside of the body did not require a thorough cleaning. Disassembly is fairly easy. The thread lock on the GS-35 oscillating pawl screws is easy to break, making removal simple. Use plastic spudgers to remove the E-clip from the worm shaft gear, and check if any worm shaft washers are fitted. Everything was then thoroughly cleaned. All internal components were still in excellent condition, with little to no visible gear wear. The bearings were cleaned, and the bushings in the right side covers were removed using a bearing removal tool.
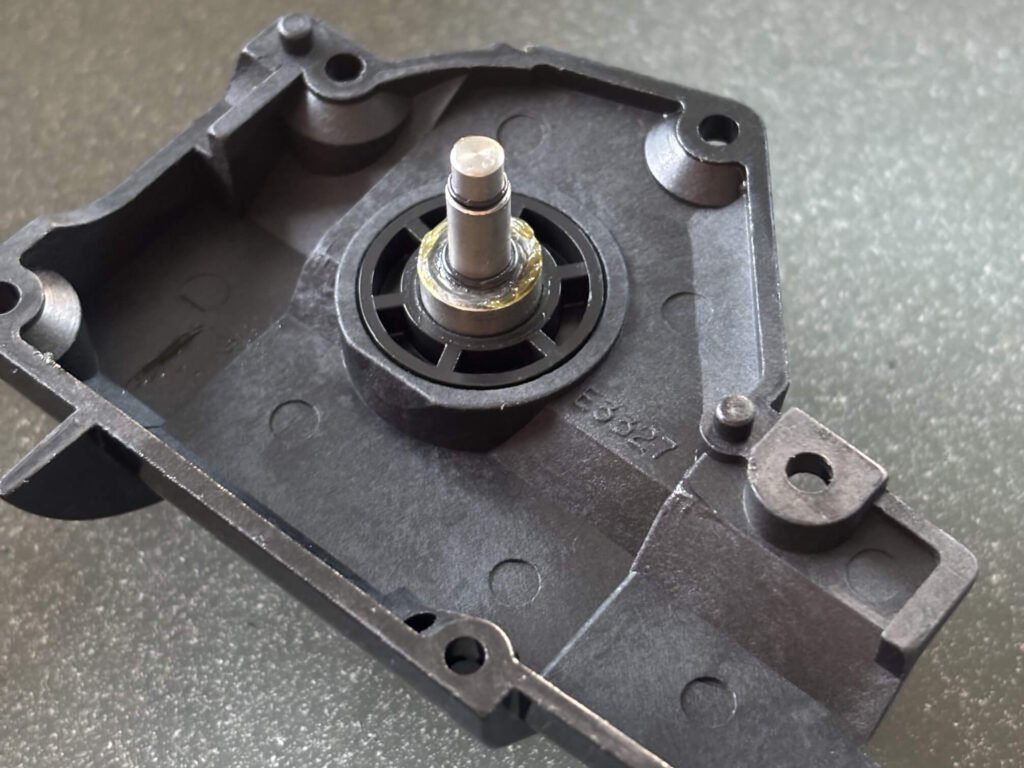
Removing the plastic drive gear bushing
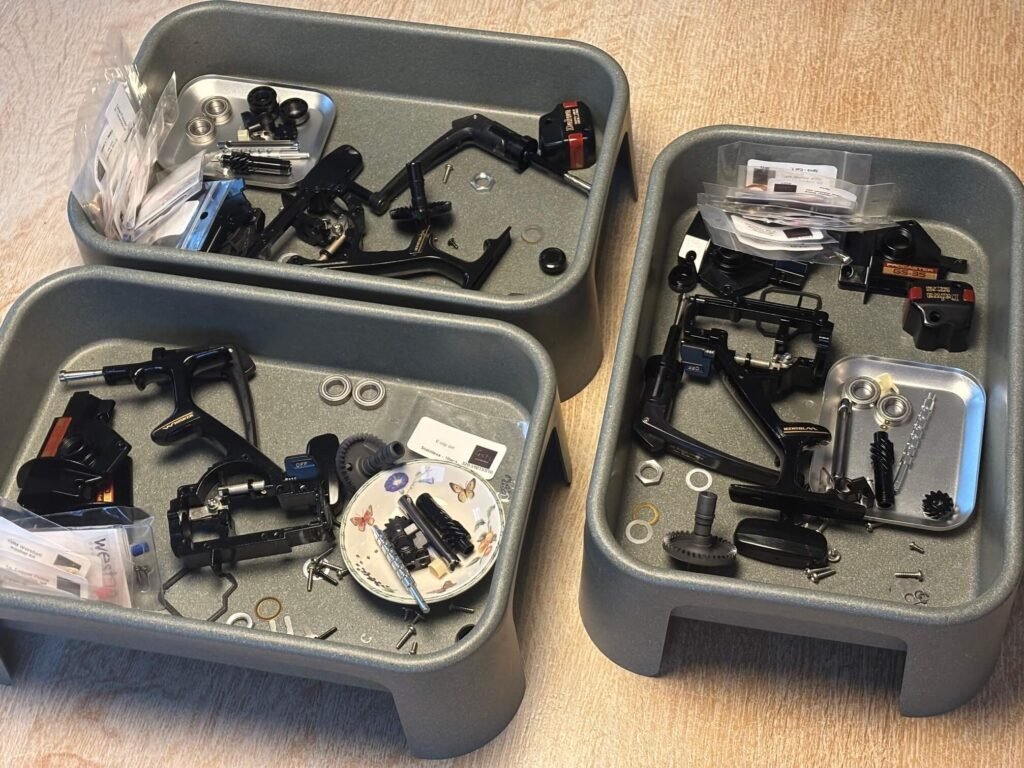
Ready for reassembly and a few upgrades
Worm shaft upgrades
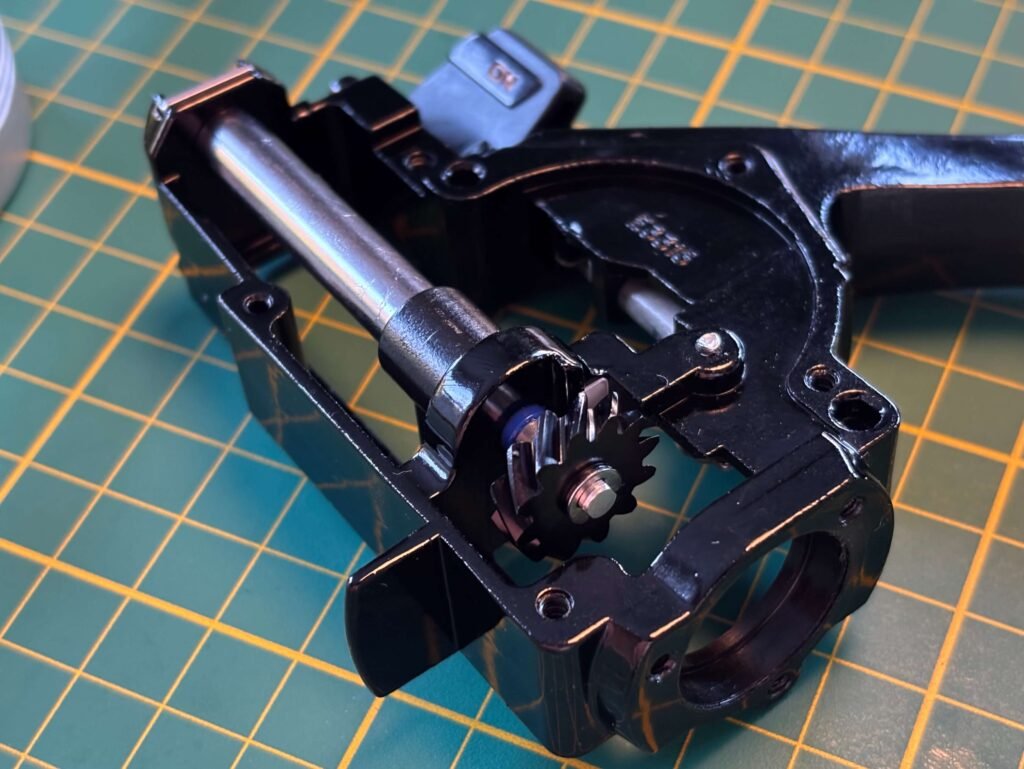
Worm shaft components and osc. slider fitted
I started by reinstalling the worm shaft assembly. The Procaster worm shafts run on bushes rather than ball bearings, and cannot be converted to bearings without modifying the body. Gato’s Whisker GS PLX upgrade kit replaces the original nylon bushes with PTFE (Teflon) versions, reducing friction and improving smoothness. While inferior to ball bearings, this is probably the best alternative available.
First, install the worm shaft bush in the body with a drop of oil on the inside. Apply grease to the worm shaft grooves and a little oil to both ends. Place the oscillating slider inside the body, then slide the worm shaft through the slider and into the bore. Fit the worm shaft gear, it can be secured later. Next, slide the shield cover onto the worm shaft with the open side facing you, and lightly oil the outside. If one was originally fitted, reinstall the worm shaft washer. Additional washers can be added later, as discussed below. Finally, oil and install the worm shaft collar (outer bush), followed by the retainer plate. The worm shaft gear can now be secured with the E-clip. Don’t forget to grease the worm shaft gear.
I had planned to add washers to reduce the axial play in the worm shaft, but after fitting the teflon replacement collar, I found this wasn’t necessary as the clearance was just right. If you’re keeping the original nylon collar, you can add extra 4 mm washers from Gato to reduce the play. Don’t eliminate all the play, though, as this can prevent the worm shaft from turning freely. A small amount of clearance should remain.
Pinion gear upgrades and extra bearing
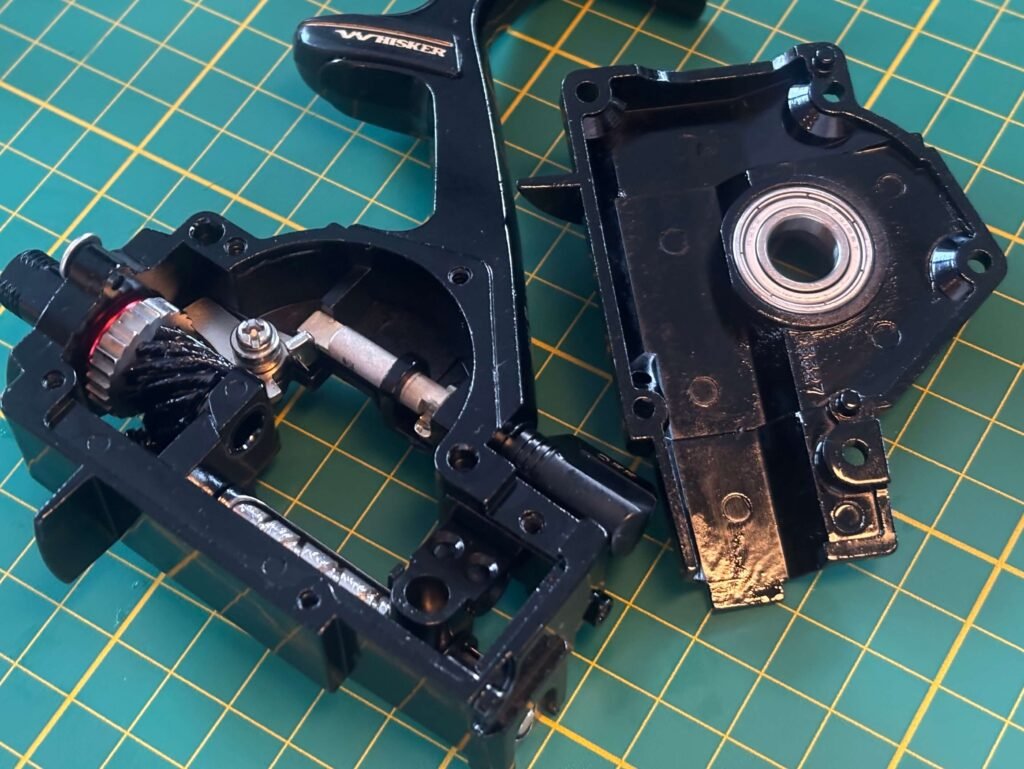
Ready for the right side cover to go back on
Next was the pinion gear assembly. The original anti-reverse ratchet has relatively few teeth, so I replaced it with an upgraded version from Weston Developments to reduce backlash. I also replaced the original spacing sleeve with Gato’s oversized hard-anodised version, whose larger diameter provides better support for the pinion bearing. Although not noticeable in practice, it was still a worthwhile upgrade. The cleaned and relubricated bearing was then fitted to the pinion gear. The gear teeth were greased, and a drop of oil was applied to the end of the shaft. The pinion holder was lightly oiled inside and refitted to the body before the pinion gear assembly was installed and secured with three screws. The original stainless steel pinion washer was replaced with a copper one from Gato. The softer copper better compensates for small differences between the rotor and body.
The right side cover could now be fitted. As the original plastic bush had been removed, it was replaced with an original refurbished 20x20x5 Koyo bearing from Gato. This is a simple, inexpensive upgrade that makes a worthwhile difference.
Rotor installation
At this point, the rotors could finally come back out, as they were ready to be fitted to the reels.
Conversion and oscillating slider upgrades
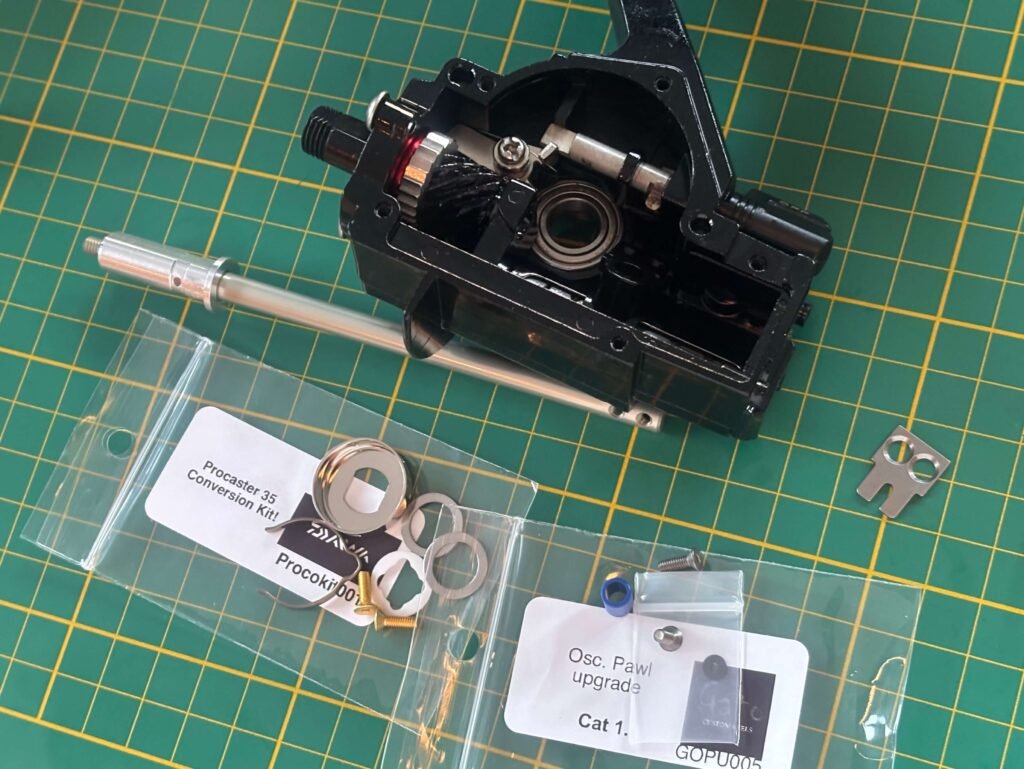
Parts for conversion and slider upgrades
To convert the reels, the original main shaft was replaced with a lightly oiled 3000-5000 series shaft. See this article for an overview of all the components needed for the conversion. To fit the shaft, first slide the rotor nut onto it, then pass it through the rotor and into the oscillating slider. With the main shaft in place, the oscillating components could be fitted, with several receiving upgrades. The nylon bushing on the oscillating pawl was replaced with a blue PTFE version from Gato’s Oscillating Pawl Upgrade Cat. 1 kit, reducing friction. The kit also includes titanium oscillating pawl screws which, unlike the originals, do not work loose over time, as well as a low-friction washer.
Lightly oil the oscillating pawl and the PTFE bushing inside and out, slide them together, and fit them into the slider. Make sure the pawl engages the worm shaft grooves. if necessary, rotate the pinion gear until the pawl drops into place. Then fit the low-friction washer, install the slider plate, and secure everything with the titanium screws.
Drive gear assembly
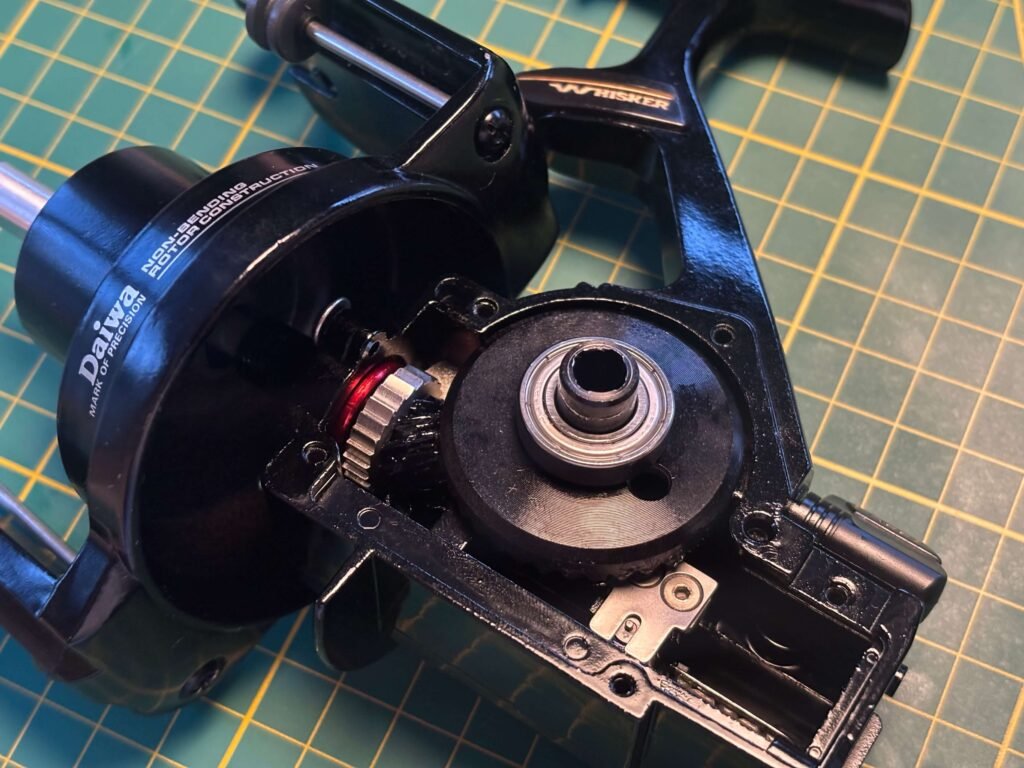
Parts for conversion and slider upgrades
The drive gear can now be reinstalled. There are a few important points to note. Make sure the spring is fitted correctly on the drive gear shaft and lightly oil it to ensure smooth operation. Apply a light coating of grease to the gear teeth; less is more. Also lightly oil both shaft ends.
The side of the drive gear facing you usually carries one or two drive gear washers, which are important for correct gear meshing and handle play. Refit the original number of washers for now, we’ll check the handle play later and tweak it by adding extra washers here if needed. Slide the ball bearing over the shaft and onto the washers. When refitting the drive gear, ensure the flat end of the spring is correctly seated in the recess of the anti-reverse pawl.
Finally, refit the left side cover and rear cover, secure the rotor, and reinstall the remaining main shaft components, the spool, and the drag knob. The handle can go back on last. With the reel back together, it’s time to fine-tune the setup.
Drive gear shimming
Now that the reel is fully assembled, it’s time to check that everything is working as it should before moving on. There are many reasons why a reel may not feel quite right, but we won’t cover those here. For now, let’s assume everything has been assembled correctly and the reel is performing as intended.
The next step is adjusting the gear mesh using additional drive gear washers. From the factory, one or two washers are usually fitted to set the gear mesh. In order to improve the gear mesh, extra washers can be added to remove most of the play from the handle, resulting in a noticeably tighter and smoother feel. See this article on how to reduce handle play and improve smoothness by shimming.
Be careful: using too many or too few drive gear washers can seriously damage the gears. If in doubt, stick to the original washers.
New spools and drag knobs
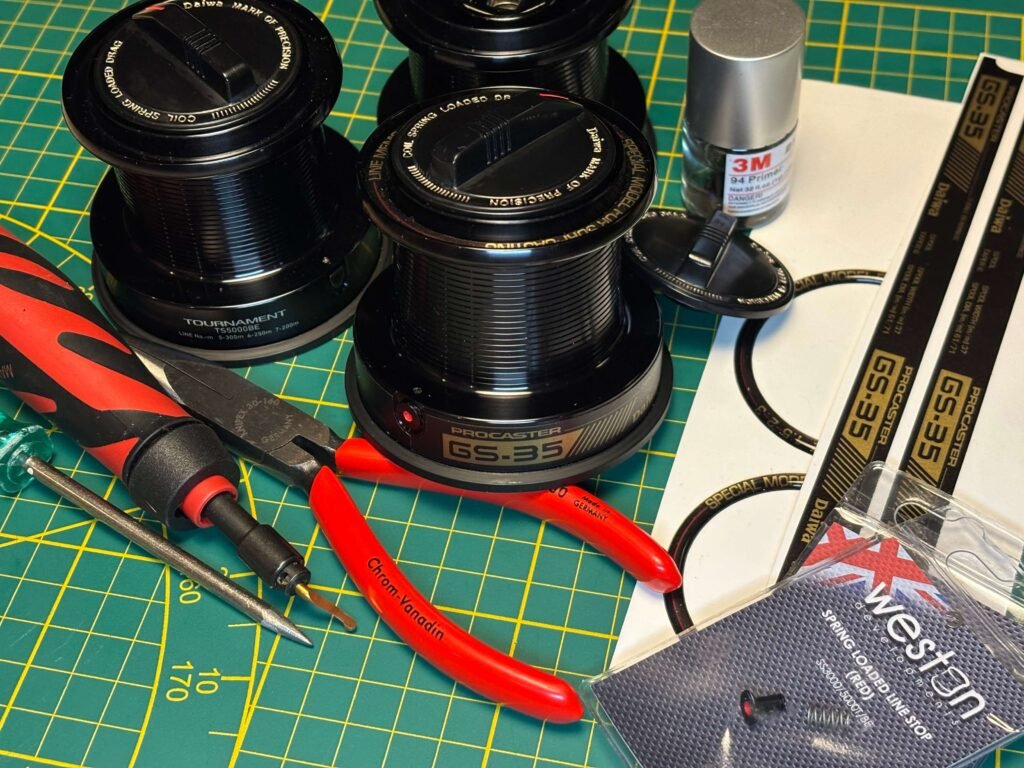
Fitting new line clips, spool wraps and top rings
As part of the conversion, I also ordered new spools and drag knobs. For the spools, I went with the glossy black TS5000BE spools. These match the glossy body of the GS-35 very well and are still available new. With a line capacity of 250 m of 0.40 mm mono, they offer more than enough capacity for my needs. They come with felt drag washers, which can be swapped for carbon ones if preferred. Personally, I’m happy with the felt washers, as they offer a less direct feel.
The standard line clip isn’t suitable for hitting the clip when casting, so I ordered replacements from Weston Developments. Not only do they look great, but they’re also spring-loaded. Swapping these line clips is an easy job with the right tools.
I also ordered custom spool wraps and gel top rings from the Signshop Kent, which really finish off the spools nicely. Another option is to remove the original wraps featuring the ’35’ from the old spools and reuse them. Before applying the wraps, use an adhesive primer to make sure they stay firmly in place.
The drag knobs I used are actually the original SS2600 ones, which are still available new. They aren’t quick drag, but several companies now offer modified versions that are. I decided to do the conversion myself, ordering the necessary parts from Gato. It involves a bit of drilling, but it’s a fairly easy job. The drag now goes from fully open to fully tight in about … turns, compared to … turns with the original drag knob.
Line lay adjustment
There is a good chance you will need to add or remove line lay washers to adjust the spool height, ensuring the line lay is correct. See this article on how to correct your line lay.
Final thoughts
The GS-35 is already an excellent reel, but it can certainly benefit from a few improvements to better meet the demands of modern carp fishing. While the conversion itself is essential, the improved line rollers and QD drag knobs are, in my opinion, worthwhile upgrades that can have a real impact when playing fish under demanding conditions. The improved line clip is a must-have for anyone who is hitting the clip when casting, as it greatly reduces line damage.
None of the refinement upgrades are dramatic improvements on their own, yet together they make the reel noticeably tighter and smoother. They’re by no means essential, but they do bring the GS-35 a step closer to the feel of a modern reel. The same applies to the improved anti-reverse. While it is still far from a true infinite anti-reverse, doubling the ratchet tooth count effectively halves the amount of backplay.
Finally, the lineguard roller upgrade is mainly a practical improvement. How durable it will be in the long run remains to be seen, but if it keeps the squeaking away, it could solve one of the reel’s biggest annoyances for very little money.
And with that, the GS-35 is better equipped than ever for many more years on the bank.
Recommendations
I’d also recommend Weston Developments and Kent Signshop for their products and service, and especially like to mention Tim van Zanten from Gato Custom Reels. He’s been a great help with these upgrades and fine-tuning the reels. I don’t know anyone who understands the Tournament models better than Tim, and his advice has been invaluable. Gato also offers a range of custom parts for these reels, well worth checking out on their website.